CleanVision: An Essential Tool for Image Data Cleaning

Translated from the original Portuguese article. Ler o original em português
While working with a radar imagery dataset provided by ICEYE, an innovative company in synthetic aperture radar (SAR) technology, I faced a significant challenge. Radar images, despite being a rich source of information, present unique challenges. Most of the samples we handle tend to be susceptible to noise, contain duplicates and suffer from problems such as improper exposure. If not handled correctly, these issues can compromise the accuracy of the machine learning models that depend on this data.
In this scenario, I started looking for a solution that could improve the quality of my image data. My search led me to the CleanVision library, a data-centric AI tool that promised to solve many of the problems I was facing. In this article, I share how CleanVision helped me improve the quality of my image data and, consequently, the accuracy of my model.

CleanVision can automatically detect various issues in image datasets, such as images that are (near-)duplicates, blurry, overexposed/underexposed, and so on. By identifying and handling these issues before feeding the data into our model, we can significantly improve the accuracy of our predictions.
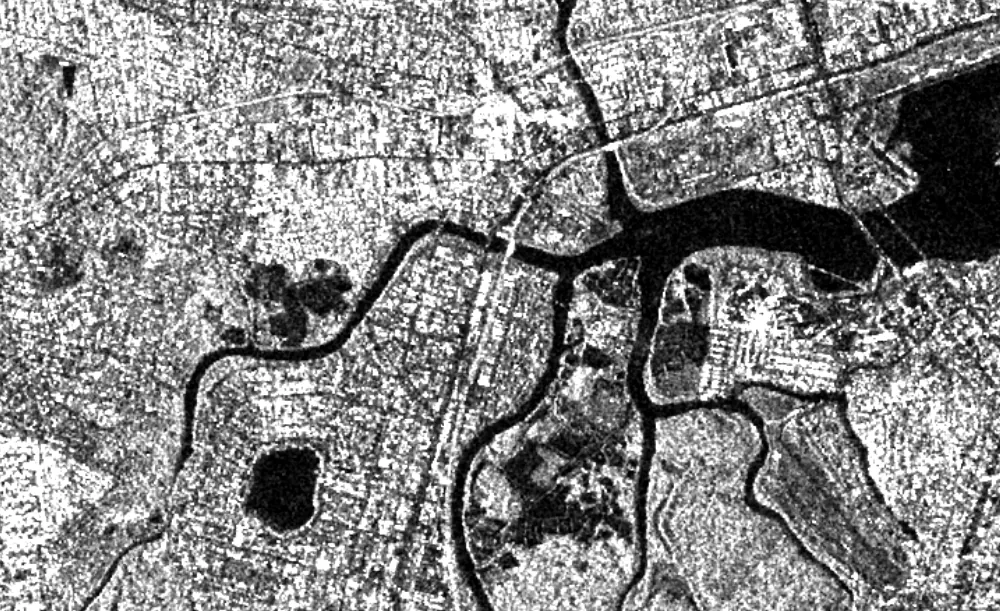
In this project, I worked with images provided by ICEYE. These radar images, by their nature, have a number of unique characteristics and challenges. Therefore, to ensure the model would learn effectively, it was essential to optimize the quality of my dataset as much as possible.
Here is an example of the images I used:
The libraries used in this project include the following:
from cleanvision.imagelab import Imagelab
import os
import pandas as pd
To start our work, we need to call the Imagelab class, specifying the directory that contains our images. Currently, CleanVision supports the most common image formats, such as JPG and PNG. So, in my case, I had to export the radar samples to JPG format using ArcGIS.
However, it is worth mentioning that to export the samples to JPG in ArcGIS, the images need to be 8-bit (8_BIT_UNSIGNED). In addition, an image composite has to be created by repeating the same band across the image channels. This process added a few extra processing steps to the workflow.
imagelab = Imagelab(data_path=r"diretory")
Continuing with our workflow, after the initial data preparation, we reach the crucial step of identifying potential issues in our image dataset. For this, we use the find_issues() function from the CleanVision library.
imagelab.find_issues()

After identifying the issues in our dataset with the find_issues() function, the next step is to get a detailed report of these issues. For this, we use the report() function.
imagelab.report()
When analyzing our set of 280 images, CleanVision was able to identify several issues. We found that 36 of the images had low information, 7 were excessively dark and 3 were blurry. This information is essential for understanding the quality of our dataset and planning the next preprocessing steps.
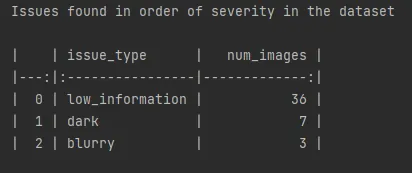
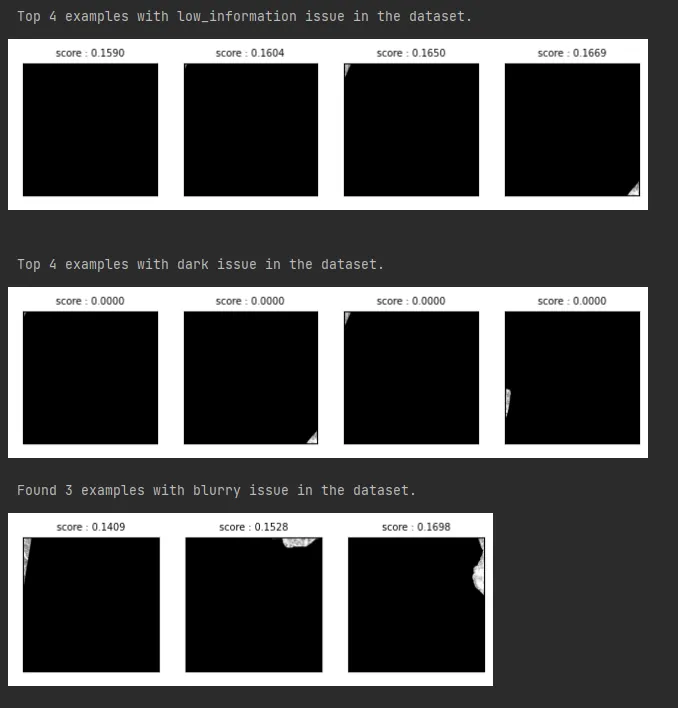
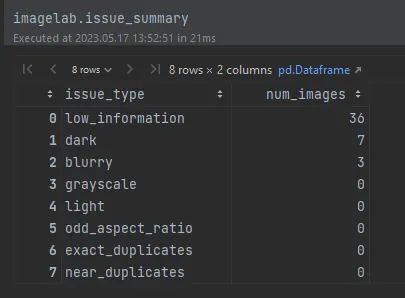
By running the full issue_summary, we get a summary of the types of issues identified in our dataset. Although the library did not detect every possible problem, it demonstrates its ability to handle a variety of common issues in image datasets. This reinforces the usefulness of CleanVision as a valuable tool for improving data quality before model training.
Using issues, we get a dataframe containing information about the score and the presence of issues in our images. In this dataframe, a "False" value indicates that the image does not have the issue in question, while a "True" value indicates that the issue is present.
imagelab.issues
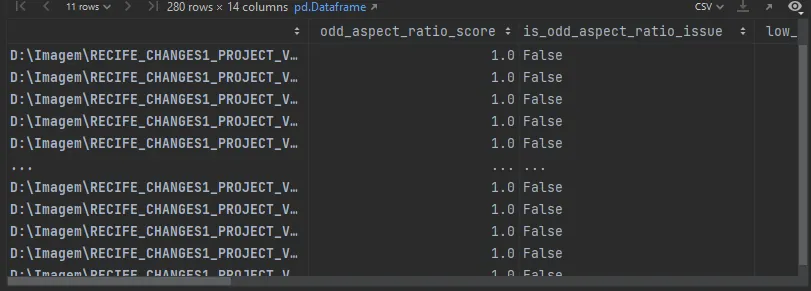
Based on this, we can filter the dataframe to include only the images that have issues (that is, those marked as "True"). We can then use the os library to delete each of these problematic images. This cleaning step is crucial to remove any images that could hurt the performance of our machine learning model.
bool_columns = dataset.select_dtypes(include=bool).columns
filtered_df = dataset[dataset[bool_columns].any(axis=1)]

delet = 0
for directory in filtered_df.index:

    # Lista de extensões a serem excluídas
    extensions = ["jpg", "jpg.aux.xml", "jgw", "jpg.ovr"]

    # Percorre os arquivos e exclui os com as extensões especificadas
    for extension in extensions:
        files = directory.split('.')[0]+ f".{extension}"
        try:
            os.remove(files)
            print(f"Arquivo excluído: {files}")

        except Exception as e:
            print(f"Erro ao excluir o arquivo {files}: {e}")
Now let's move on to mapping the existing images and labels, making sure each image is properly associated with its corresponding class or category. This step is crucial for maintaining data integrity, because if it is not done correctly, you will not be able to associate the data and, consequently, you will not be able to train the model.
Once the mapping of images and labels is complete, we are ready to move on to the next steps of the project, such as training the machine learning model and making predictions or analyses on the data.
map_file_path = r"diretory\\map.txt"
image_paths = r"diretory\images"

with open(map_file_path, "w") as f:
    for image_file in os.listdir(image_paths):
        if image_file.endswith(".jpg"):
            label = image_file[:-3]
            image_path = os.path.join(r"images", image_file)
            label_path = os.path.join(r"labels", label+"png")
            print(image_path, label_path)

            f.write(f"{image_path} {label_path}\n")
One adjustment I ended up not making is tuning parameters, such as the threshold, to further improve the analysis and cleaning of the data. With this adjustment, we can adapt the sensitivity of the issue detection, allowing us to customize the cleaning process to the specific characteristics of our dataset.
This tool has proven valuable to me and is helping me improve the data quality of my computer vision projects, allowing me to effectively handle a variety of common issues in image datasets. Using it only highlights the importance of data cleaning and preparation in the machine learning process. After all, the quality of the data we feed into our models is a determining factor for the accuracy and effectiveness of our predictions.
I hope this article has given you a useful overview of how the library can be used to improve the quality of image data. Whether you are an experienced computer vision professional or just starting out in the field, I believe it can be a valuable addition to your machine learning toolkit.